“No Surprise” Billing Regulations
The “No Surprise” Billing Regulations for Behavioral Health Care Providers
When did this occur?
The No Surprises Act was included in the Consolidated Appropriations Act, in 2021. Finalized on October 7, 2021, this new requirement will go into effect on January 1st of 2022.
Why was it created:
It was created to increase and improve pricing transparency and decrease the probability of consumers being surprised by a medical bill.
Who does the law apply to?
The law extends to all health care clinicians and institutions, provided they are licensed, certified, or recognized by the state.
How does this affect you as a behavioral health clinician?
Providers of behavioral health services are legally obligated to inform clients of the anticipated cost of service prior to the service being performed and upon their request. Therefore, after a patient has booked an appointment, or at their request, a good-faith estimate must be issued. It should contain anticipated prices for the service they're receiving, as well as any other services included in the same planned appointment or encounter.
How do I tell my clients about the anticipated cost of service?
Using ICANotes, you can create forms in two different areas. The first is the form builder, which is available with the premium portal. You are able to create a form listing your anticipated cost of service and have the client sign this form via the patient portal. This process is effective when having clients that are seen via telehealth. You can utilize the form builder in ICANotes to create your form for in-person visits. Your clients can sign using the capture signature device. Below we have included instructions on how to use both methods. While electronic documents and signatures are time-saving, you can utilize paper forms and upload these into ICANotes. Attached is a PDF that has the standard notice and consent documents provided by CMS under the no surprises act.
Additional Information
The No Surprises Act of 2021 is intended to protect consumers from unexpected medical bills. Many clinicians are unsure whether it applies to the services they provide. The short answer is more than likely yes. It is essential to understand why this new law has come to fruition and what you need to do to comply.
Typically, when a person with health insurance coverage seeks care from an out-of-network provider, their insurance does not cover the full out-of-network cost. This results in higher costs than if an in-network provider had treated them. In addition, many times it is difficult for a patient or client to determine what healthcare provider or hospital is in their network. This is especially true in emergency situations. Unless state law prohibits it, an out-of-network provider can usually bill the person for any difference between the billed charge and the amount paid by their health plan. This is called "balance billing," and it leaves many patients with a "surprise bill."
Many people have asked if this law applies to insured or non-insured, and the short answer is both. In accordance with the regulation, health care expenses must be made known to a patient or client before they receive them. The ruling also ensures that patients will be able to contest a charge if it is much larger than anticipated. The contesting can be done through a third party called an "Independent Dispute Resolution Entity."
Clinicians are wondering what they should do to abide by the No Surprise Act, and we have some resources that may be helpful to you. In accordance with the Act, healthcare providers and facilities must inform patients that receiving care out-of-network may be more expensive and offer options for avoiding balance bills. Additionally, for individuals that do not have insurance, "good faith" estimates are required. The estimates provide a ballpark figure of what the patient's treatment will cost before they receive it.
The onus falls on the clinician to inquire about the patient's insurance coverage; this then determines whether the care provided is out of network or if the client is self-pay. Good faith estimates should be provided to all patients, and this can be done in an electronic format via a patient portal or on paper if requested. The estimate should be in an easy-to-read and understandable format. If you have a website, you can post your fees on the website, for example. Some practices are posting their fees at the reception area and even in individual patient care areas. You could then ask your patient if they have seen your fee schedule and confirm this with them verbally. According to the mandate, you should provide a written good-faith estimate of charges as well.
Clinicians are all too familiar with the HIPAA notification that has to be provided to patients prior to service. The Good Faith Estimate should also be provided in the same manner. The information should be personalized, such as the patient identifiers, clinician identifiers, and billing rates. A customer should receive a new list every year, especially if you have had rate changes.
The form should be separate from any other intake forms for your practice. In the form, verbiage should be added to protect your practice stating that estimates are guidelines and may result in variances in actual costs or services. However, if the variance is over $400, the patient has a right to dispute the charges. You must include information regarding the Independent Dispute Resolution Entity. You should also state that the additional services you may recommend – such as ECT, TMS, crisis appointments, etc.-- are not included in the good faith estimate. Most importantly, the patient needs to understand that getting an estimate does not bind them to receive any of the services specified. The information is to simply inform them of possible charges should they seek to receive care from your practice.
After reading this, if you think the new law will be cumbersome and take additional time, you are correct. In addition to providing billing information to the patient, you need to document that you did so and how you did it. The ICANotes team recognizes the additional burden this will place on mental health practices, and we are prepared to help ease this burden by providing simple and quick workflows within our EHR.
Reference
Form Builder in the Portal
This is a Premium Patient Portal feature. For information about all features including printable PDF instructions for your office and your patients, please see our Premium Patient Portal Knowledge Base Article.
IE (Internet Explorer) 8, 9, and 10 are not HIPAA compliant. We do not support these browsers.- Please make sure your browser is fully updated.
Creating a Form
1. As a Portal Admin, log into the Patient Portal at https://patientonlineportal.com.
2. Click the  link.
link.
3. Select the  button.
4. (Steps 4 through 7 are optional - only required if you want to use a Header.) Click  in the top right to set the Header. The Header is an excellent place to put your logo.
5. (Skip if not creating a Header.) Drag an image into the box (or tap the blue bar to upload). Supported file extensions for images are .jpg, .jpeg and .png only.
6. (Skip if not creating a Header.) You can adjust Alignment and Placement. Shown above, the header will be aligned in the right and the header will show only on the first page.
7. (Skip if not creating a Header.) Once the Header is set up, click the  button.
8. Click the  button. This window will populate.
9. Type in a Form Name.
10. Include Header turn on/off using the slider. (Header created in steps 4 through 7 above)
11. Choose which Folder you want the form in. This is where the form will be found in the Upload Site and ICANotes.
12. In the Parts section, click the  button. This is where you create the content of the form.
13. Choose the first section of the form from the dropdown menu.
14. Click  button to continue creating the form.
- Text only selection:
- Textbox selection:
- Radio buttons selection: After typing in the question, click the
button to fill out answers.
- Checkboxes selection: After typing in the question, click the
button to fill out answers.
- Dropdown list selection: After typing in the question, click the
button to fill out answers.
- Multiline textbox selection:
- Horizontal Line selection: While this does not show the horizontal line, on the preview/published form it will show the line.
- Signature selection: This adds an area where the patient can sign using his/her mouse.
The  button will cancel all changes and go back to Forms Builder page.
Clicking the  arrow on the left of the selection, will cause the Parts selection to collapse to
  icon. When this icon shows, you are able to move around the Parts selection. (This does not appear for Edge, IE, Safari, and mobile devices. For these browsers/mobile device, use the
  to move up or down.)
Hover over the icon, and the crossbar will show as shown. 
Once the crossbar shows, you can drag the Part to another area.
Clicking the  button will delete the selection.
Clicking the  button will copy the selection and place at the bottom of the Parts area.
15. Once you have created your form, click the  button.
16. When your form is ready, click the  button. You will receive an alert in the bottom right of the screen telling you that the form was published.
17. Click the  button. Once this has been published, you will always be able to edit the form from the Forms Builder by clicking on the form name. Let's go back into the form. Click the form.
18. Under Availability choose if you want the form sent manually, always available, or available only once.
19. Click the  button.
20. Once this has been saved, you will always be able to edit the form from the Forms Builder by clicking on the form name.
Manually Send Forms
1. Now we will send a form (or forms) to a patient. Click the  button.
2. Search for your patient using Patient Name, Patient age between, Patient created between, or Patient appointment between. Click the  button after criteria has been input.
3. Patients that meet the criteria show. You will notice that this patient was sent the Current Tobacco Use and Depression Assessment and Goals forms already. Let's send another one. Click the  button.
4. Select the form(s) to send to the patient and then click the  button.
5. You will see that the form(s) has been sent to the patient. You will also see when a form has been completed.
Note: You can also use this area to see when a patient has registered for the portal. You can see the patients I circled have registered for the portal.
Let's visit the patient's Patient Portal
1. On the Patient Portal as a patient, click the Forms link on the top.
2. The patient will see forms listed on the left side. The patient will be able to fill out the form by clicking on it.
3. If you have built in a signature field, the patient clicks in the field and a popup window will populate where the patient can sign his/her name using the mouse. Once satisfied with the signature, click the 'Authorize Signature' button.
4. When the patient is ready to submit his/her form, he/she clicks the  button. If the patient started to fill out the form but wishes to finish it later, click on the
  button. They will be able to return to the Forms area at any time to finish the form and send (by clicking the
  button).
How to obtain the completed form in ICANotes
1. From the patient's Chart Face, click the Documents tab.
2. You will see the form in the list of documents.
3. Click the  button to see the completed form. Notice right-sided header, centered title, questions with answers, and patient signature.
How to obtain the completed form on the Upload Site
1. Log into https://upload.icanotes.com.
2. Find your patient on the left side.
3. The form will be found under the folder you assigned in Step 11 of Creating a form.
Watch our video demonstration of the Form Builder:
Watch our three form comparison video from the patient's perspective:
Creating a Form in ICANotes
Creating a Form is a quick and easy way to generate a form on behalf of you or your practice.
From the Chart Face, click the  button.
1. On the left side of the Form Builder screen, you will see the working text of your letter. You may manually type in this field, or use any Custom Buttons you have listed in the column on the right to enter text. If you find that you are entering the same (or similar) text into multiple Form Letters, we recommend that you create a Custom Button containing the text content to save time.
2. At the top, you will see the letterhead and the name of the selected clinician; these can be changed by...
3. Selecting a clinician name for 'Name on Form Letter' and/or adjusting the Location with 'Location on Form Letter' 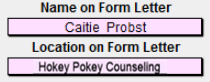
4. You can insert patient information into the form builder field much like you can with custom buttons. Select a term from the dropdown menu and click the Insert key to insert into the form letter field. 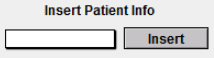
5. The  button will allow you to print the letter as it is displayed.
6. The  button deletes the letter and returns you to the Chart Room.
7. The  button is similar to “Compiling” a note. It will save the text of the letter in the patient’s Chart Face alongside their notes.
8. Custom buttons can be created for future form letters or common phrases. You can access these with this button: 
For more information on Custom Buttons, please check out this knowledge base article!
3. If you print the form, you have choices on what patient information you would like shown (if any).
4. If you choose to “Save in Chart,” you will be brought to the finished note screen. Here, you have all the available options of any compiled note including the ability to electronically sign.
5. If you chose to 'Save in Chart,' the letter will be found in the list of notes on the patient's Chart Face. You can preview the letter using “Compiled Note” or go back and edit the text of the letter using “Work Areas.”
Related Articles
Using the Billing Reminder Sheet
The Billing Reminder Sheet is a report that lists scheduled appointments between a specific date range. If your practice is not using the ICANotes Appointment Book, then this report will not yield any data. If you are using the ICANotes Appointment ...Payment, Adjustment, and Billing Codes
Payment/Adjustment Codes Payment/Adjustment Codes can be applied to insurance or patient payments, which can later be tracked within the various Patient Accounts reports. A user with Group Administrator access can create and modify Payment/Adjustment ...Setup Information for Billing Clearinghouses
ICANotes works with several clearinghouses (for a list, see our Clearinghouse Options for Electronic Claims Submission guide), although some of the clearinghouses do not provide us with information that we need to add to our system to complete this ...Electronically Billing a Treatment Plan
This Knowledge Base article explains how to electronically bill a Treatment Plan when the Service Code option is not available. To enable the "Service Code for Treatment Plans' group rule, please have a Security Administrator submit a request by ...Billing and Diagnosis Coding Resources
Below are several resources you may find useful when trying to select a Billing or Diagnostic Code for use in ICANotes: Searchable Database of ICD-9 Diagnostic Codes Searchable Database of ICD-10 Diagnostic Codes ICD-9 to ICD-10 Conversion Tool List ...