Chemical Dependency Treatment Plan
1. Begin in the patient's active Chart Face.
2. Click the  tab.
tab.
3. On the Treatment Plan List, click the  button to create a new treatment plan.
4. This will open further selections.
- Name the treatment plan.
- Choose which type of treatment plan.
- Choose the Site Name.
- Click the
button.
5. This is an example of two treatment plans showing on the Treatment Plan List for this patient.
- Click the
button to enter the treatment plan.
- The treatment plan name entered by user.
- Type of treatment plan.
- When the treatment plan was last created.
- When the treatment plan is next due.
- The site name/location of treatment plan.
- Default toggle.
- Edit button to edit the name of treatment plan.
- Click to delete the treatment plan.
6. Click the  button.
7. This will open to the starting screen for your treatment plan. You will build your treatment plan by problem.
8. Click the  button.
9. On the next screen, choose your problem type from the top left. 
10. Work from left to right through the shrub to select the Problem, Manifested by and Details that make sense for your patient.
In the example below, Substance Use disorder was chosen as the problem with Cocaine Use as a manifestation and "Associated Psychotic Symptom" as a detail. The red box shows the Problem Text that was populated from the choices made for problem, manifestation, and details; you can free text into this field as well. The orange box shows that the title of treatment plan problem is now titled as Substance Use Disorder.
11. When you are satisfied with your problem text (green box above), begin working from left to right through the tabs. Click on the  tab.
tab.
12. Under the Long Term Goal Tab, you will see several options that ICANotes has prepopulated for your use. If you decide you would like to use one of the long term goals listed, simply click on the goal to put the goal into the Long Term Goal(s) text field on the right. You are able to free text in the Long Term Goal(s) area as well.
- In the left field (Green box), the problem/need is shown.
- Pick a Long Term Goal
- Pick a Target Date.
- Click a Target Date.
- Click the
date.
- The field on the right (red box) shows the Long Term Goal chosen.
13. Click on the  tab.
tab.
List of manifestations based on what you selected as your problem in step 10. Click on the manifestation to reveal a list of prepopulated short term goal options.
- Select a Short Term Goal.
- Select a frequency, period and duration that is appropriate for the goal.
- Add a new blank STG by clicking the
button.
- Add a custom button by clicking the
button
- Select Frequency and other details (optional fields). Completion Date and Status are generally filled out after a goal has been met.
Note: You can add a frequency by scrolling to the bottom and clicking Edit...this will open another window where you can edit existing data or add new.
14. Click on the  tab.
tab.
- In the left field, the problem/need is shown.
- Select your discipline using a radio button. This will reveal a list of common interventions that you may choose to use in this treatment plan. Alternatively, you can create and select your own interventions using the custom buttons.
- Pick a Short Term Goal
- When an intervention is selected, the intervention text is displayed on the right. You can edit the content in each yellow text field as needed. An example of this would be to change 'Psychiatric/Prescriber' to 'Therapist' to better match your credentials.
If you would like, you can use the dropdown menus for Frequency, Time Period and Duration to specify how often this intervention takes place.
You may use the trash can icon  to delete an intervention you may have mistakenly selected.
15. Click on the  tab.
tab.
- On the left, there is a list of strength categories. Select the category in which your patient has strength(s).
- The program will offer several pertinent options from which you may select.
- The selection will add prepopulated text in the text field. You can also type in the patient strength(s) or utilize a custom button.
16. Click on the  tab.
tab.
- On the left, there is a list of barrier categories. Select a category in which your patient has barrier(s).
- Select an option from the Staff Plan list that correlates with the barrier category you selected. More than one can be selected.
- Click the
button when ready.
- The selection(s) will add prepopulated text field. You may opt to type in a specific barrier not in the list or utilize a custom button.
17. Click on the  tab.
tab.
- Progress in meeting goals and resolving this problem
- Recommendations
- Disclaimers/Explanations
- Status/Discharge Plan
- Status Text
- Start New Entry with Date
18. If this is a follow-up treatment plan, you can document the patient's progress by clicking one of buttons from this area. (Remember, you are always able to add your own text by clicking in the white field and typing any additional information.)
19. If this is a follow-up treatment plan, choose a recommendation for the treatment plan.
20. The Disclaimers/Explanations offers four choices. The  button will open a shrub window for multiple antipsychotics.
21. The status/Discharge Plan (D) is for documenting a Transition Plan. If your patient is in the outpatient setting, you may skip this section.
22. Any information that you have input will show in this text field. You can free text any information into this window. Please note, there are no custom buttons on this tab.
23. Click the  button to create a line on the page with the date.
24. Click on the  tab.
tab.
25. Set the Meeting Date, Start/End times and Type of Meeting.
Click within the Meeting Date area and set the date of treatment plan.
Click within the Start/End times. 
Within this field, you can select what type of treatment plan you are creating/updating.
26. Create the Treatment Team by selecting the member from the dropdown menu and position of the member from the dropdown menu. The Completed toggle can be toggled when the member has completed their portion of the treatment plan.
27. The attendance list is created from the members created in step B. Attendance can be toggled to indicate who was present at the meeting.
28. The last done/next due date can be adjusted here. 
29. You can select whether or not you want to include the diagnosis in your treatment plan. 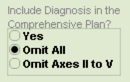
30. Use the 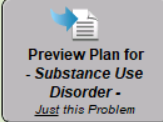 button to pull all of your information together for this problem.
31. Once you have compiled the problem, it will show up in the yellow text field.
32. Click the  button if another problem needs to be added.
33 Click on the 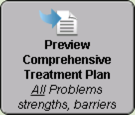 button to save this problem and return back to the main treatment plan page.
34. The Last Done Date window will open.
35. Preview the report in the yellow field on the right.
36. When you are ready to save to a progress note (and all team members have finished with the treatment plan), click the  button.
37. You will see a window prompting you to create a reminder for when the next treatment plan is due.
If you choose "Yes" the program will allow you to set up a reminder for when the next treatment plan is due for this patient.
When the due date arrives, you will receive a message in your Messaging Center (accessed from the Chart Room) reminding you that a treatment plan is due for this patient.
If you select "No", no reminder is created.
38. You will proceed to the Finished Note screen.
39. Read through your finished treatment plan note and make any minor corrections in the text field on the left. If any major corrections need to be made to the content of the treatment plan, such as correcting a long term goal or adding an additional problem, you should use the green  button to go back into the work areas of your treatment plan and make the changes there.
40. Once you have read through your note, you may use the  button to print paper. If your facility is going completely electronic, use the
  button to electronically sign the note, making it a legal document.
Note: On the List of Active Prob. tab:
- Add new problems by clicking the
button.
If you use the "x" box next to a problem, this tells the program the problem is inactive and it will not be included in the compiled note.
You may use the  trash can icon to delete a problem.
Chart Face
You can choose which Active Problem/Need List you want to show on the Chart Face. Click on the box next to the Active Problem/Need List to expand the dropdown menu. Select which Treatment Plan you would like to view on the Chart Face.
Related Articles
Chemical Dependency Treatment Plan
Overview This Knowledge Base article provides guidance on creating a Chemical Dependency Treatment Plan for clients. The plan includes a list of dimensions, each allowing you to add a corresponding problem. Based on the selected dimension, relevant ...How to Link Note to Treatment Plan
Overview This knowledge base article guides you to link notes to the treatment plan. The following notes can be linked to the treatment plan. Progress Note Case Management Complete Evaluation Couples/Family Therapy Linking Progress Note to Treatment ...Chem (Chemical) Dependency (6 ASAM Dimensions) Assessment
This knowledge base article will show you how to create and complete and a Chemical Dependency Assessment. 1. From the patient's Chart Face, choose the Chem Dependency (6 ASAM Dimensions) button. 2. The Dimension 1 tab is for ASAM Dimension 1: ...Chemical Dependency Work Areas by Site
A Security Administrator or the Group Owner needs to email ticket@icanotes.com and request that the following two group rules be turned on: Use Chem Dep Specific Work Areas Use Chem Dep Work Areas by Site Once you have confirmation that the two group ...Treatment Plan Administrator
Treatment Plan Administrator What is a Treatment Plan Administrator? The treatment plan administrator is a user that is able to see treatment plans due dates for all users within the group. The administrator can monitor the treatment plan due dates ...